
[iStock]
As tutors, it is important to make our lessons engaging and fruitful for our students. This is especially so for O level Sciences because it can be dry for our students.
One way to liven up your lessons is to incorporate science experiments into our lessons.
Here are 5 science experiments you can conduct during your tuition session that are safe for a home setting.
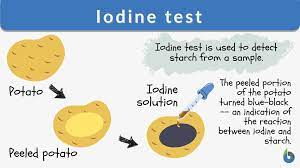
Starch Iodine Test
[Biology Online]
One of the four infamous food tests that your student may encounter in the O Level Biology practical. The starch iodine test. It tests for the presence of starch. When amylose in the iodine reacts with the starch (if there is any), which causes the iodine to turn into a fascinating blue-black.
Here’s what you need:
1. Dropper or syringe
2. Iodine (you can get this from any pharmaceutical shop like Watsons)
3. Starchy foods to test: peeled potato (cooked or raw), pasta, rice, or bread
4. Non-starchy foods for comparison: apple, cucumber, pure sugar, and any others you would like to try
5. Newspaper
6. Paper plates
Steps:
1. Cover the table with a newspaper (this is so that the iodine won’t stain the table)
2. Place the foods on individual paper plates
3. Add a drop or two of iodine to the potato
4. Observe if there is any colour change
5. Repeat for the other foods
6. Record it into a chart with rows and columns to compare which foods have starch and which foods don’t
7. When you’re done, wash your hands and throw everything away.
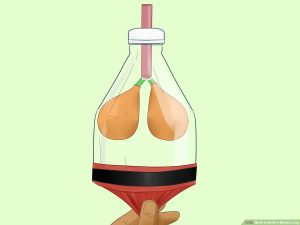
Construct Model Lungs
[wikiHow]
A concept tested in O level Biology is the movement of the diaphragm and how the lungs work. And this experiment exhibits this, allowing your student to see how the lungs work and better understand this topic.
Here’s what you need:
1. Empty bottle
2. Two balloons
3. Tape (masking tape or duct tape)
4. Scissors
Steps:
1. Cut the bottom of the bottle off (about 3 cm)
2. Take one balloon and put it inside the bottle. Then fold the bottom of the balloon around the bottle’s rim, so the balloon hangs from the top.
3. Tape the balloon to secure it tight
4. Tie a knot at the end of the remaining balloon and cut the large part of the balloon in half horizontally.
5. Stretch the open end of the knotted balloon over the bottom of the bottle.
6. Tape it
7. Gently pull down on the balloon from the knot. This should cause air to flow into the balloons within your lung model.
8. Release the balloon with the knot and watch as the air is expelled from your lung model.
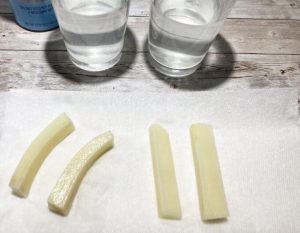
Osmosis in Potato Slices
[Little Bins for Little Hands]
Another concept tested in O level Biology is osmosis and diffusion. It is when particles move from an area of higher concentration to one of lower concentration. For your students, they might find this difficult to visualise, so to help them understand it better, you can try out this experiment.
Here’s what you need:
1. 15 slices of peeled potato (must be the same size and length)
2. 5 plastic containers (must be big enough to hold the potato)
3. Water
4. Salt
Steps:
1. Pour 100 ml of water into a container
2. Mix 1 gram of salt to 100 ml of water into another container
3. Repeat this 3 more times, adding 1 more gram of salt each time (you should have 5 containers of water with concentrations of salt being 0, 1, 2, 3, 4, respectively)
4. Put 3 slices of potatoes into each container
5. Let the potato slices immerse in the solutions for 20 minutes
6. Take the potato slices out and measure them
7. You’ll realise that the potato slices in the solutions with higher salt concentrations are softer than the ones in solutions with lower concentrations of salt.
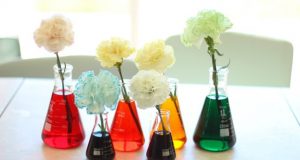
Plant Water Transport System Experiment
[Little Passports]
A creative way to test the water transport system in plants (tested usually in primary and lower secondary science). When you add food colouring to the water, the flowers absorb the “dye”, and it changes the colour of the flower. These flowers also serve as wonderful decorations or gifts!
Here’s what you need:
1. Three white roses
2. Food colouring (three different colours)
3. Three containers
4. Water
Steps:
1. Pour water into a container
2. Choose a food colouring and add it to the water (such that the colour is reasonably strong)
3. Cut the flower stem at a 45-degree angle
4. Put the flower in the coloured water
5. Repeat steps 1-4 for the other two colours that you have (each containing a different colour)
6. After 24 hours, you will realise that the white roses have become the colour of the food colouring
Oxidation in Coins
[Buggy and Buddy]
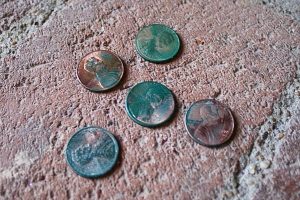
Oxidation is one of the important Chemistry topics that your student has to study for their O level Chemistry paper. But it can be challenging trying to visualise the chemical reaction. So to help them visualise and understand the concept, you can oxidise coins!
Here’s what you need:
1. Copper coins
2. Salt
3. Vinegar
4. Shallow tray
5. Paper towels
Steps:
1. Wet the paper towel
2. Place the coins onto the paper towel
3. Sprinkle the coins with salt.
4. Observe it at regular intervals until the next day
5. You will realise that the coins will turn green, which is oxidation.
Conclusion

[Shutterstock]
Practical learning is a great way to help your student grasp concepts and practise for their practical lessons. But when it comes to lab work and experiments, it can be hard because of various reasons like not having the proper equipment or having safety issues.
But here are some safe experiments that only require everyday materials that you can find in your or your student’s house. Have fun!
Fun Physics Hands On Activities for Young Kids That You Can Do At Home
A Look Into the Life of Albert Einstein – Why Learning Science is Important
